


Hey,
This post helps you to create an elegant calender chart in Tableau.
I'm using Sample-Superstore data here.
Open Tableau workbook and select Sample-Superstore in the saved Data Sources.
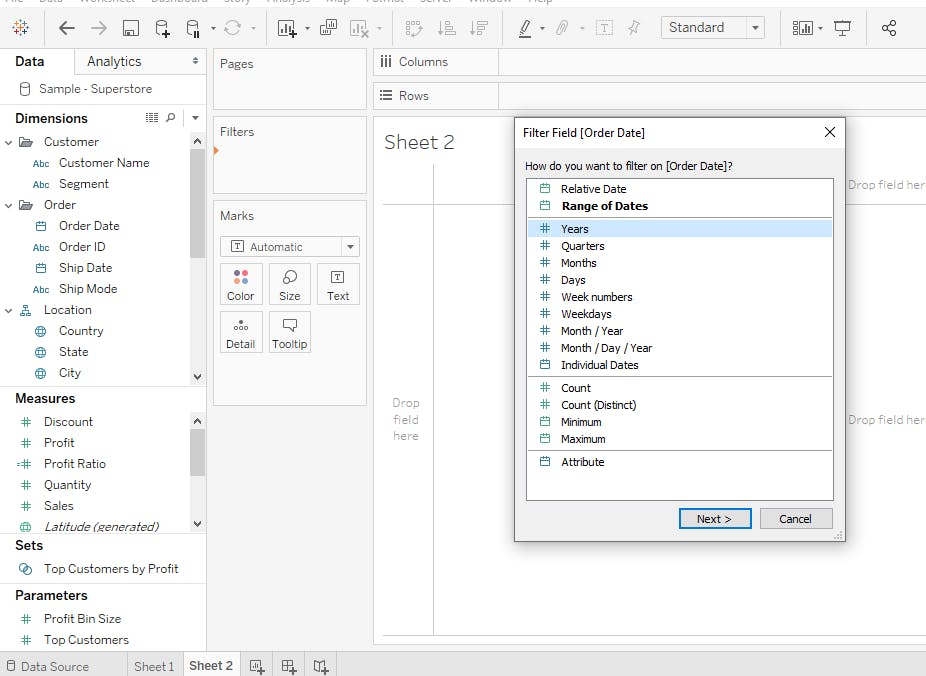
Step 1 : In the dimensions list select 'Order Date' and put this on Filter shelf.
- Now you will get a list, select 'Year' --> next --> select any year --> OK (I have selected 2018 here)
- Right click on Year Filter and select 'show filter'.
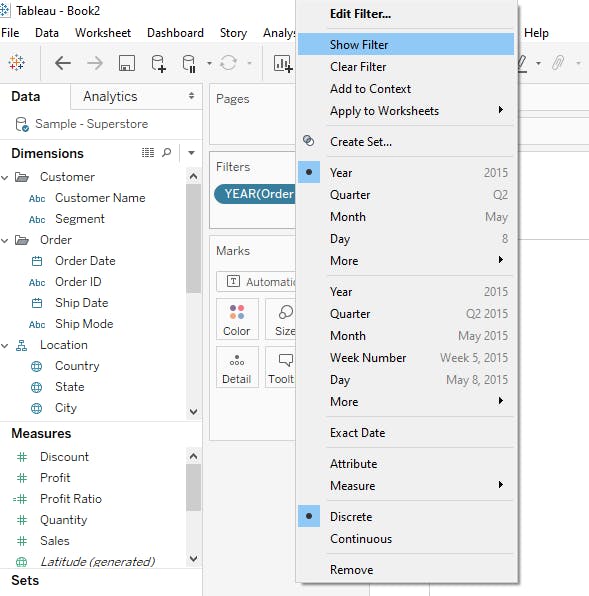
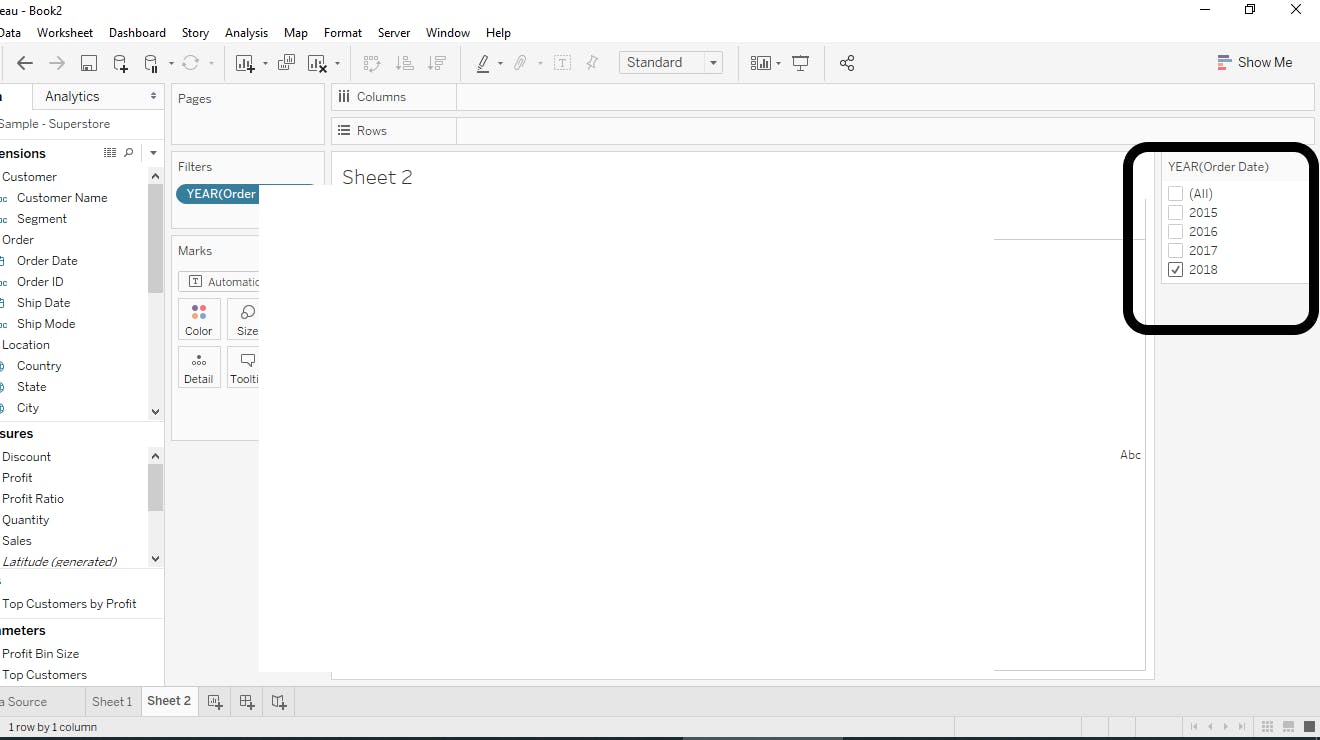
- You will see a Filter option at the right side of your workbook. (This will allow user to select any Year of his choice)
Step 2 : In the dimensions list select 'Order Date' and put this on Filter shelf.
- Now you will get a list, select 'month' --> next --> select any month -->OK (I have selected November here)
[this is same as above but we are selecting month here in step 2]
Right click on Month Filter and select 'show filter'.
You will see a Filter option at the right side of your workbook. (This will allow user to select any Year of his choice)
Step 3 : We need to create 3 Calculated fields.
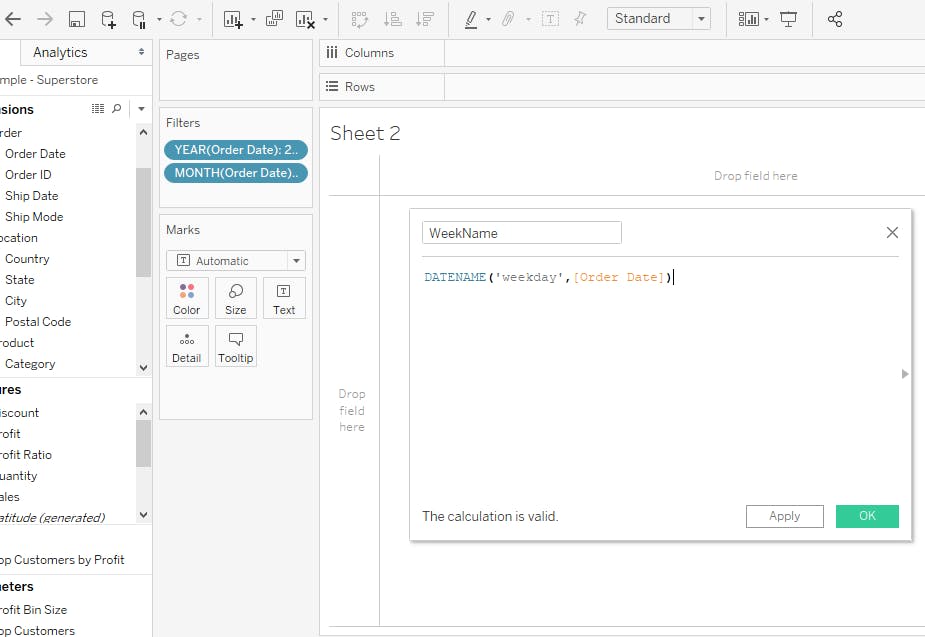
Calculated field (1). Name it as 'WeekName'
Type the below Line and click OK.
datename('weekday', [Orderdate])
I have attached a sample screenshot for calculated filed (1)
Do the same for rest of the fields as mentioned below.
Calculated field (2). Name it as 'WeekNo.'
Type the below Line and click OK.
datename('week', [Orderdate])
Calculated field (3). Name it as 'WeekDay'
Type the below Line and click OK.
datename('day', [Orderdate])
Step 4 : We have 'WeekName' already on Dimensions.
- Let us convert other 2 calculated fields 'WeekNo.' and 'WeekDay' to dimensions which are auto saved in measures field.
- To convert measures to Dimensions. Right click on '#WeekNo.' and select 'Covert to dimension' option. Do the same with '#WeekDay'.
Now we have all the created calculated fields in dimensions tab.
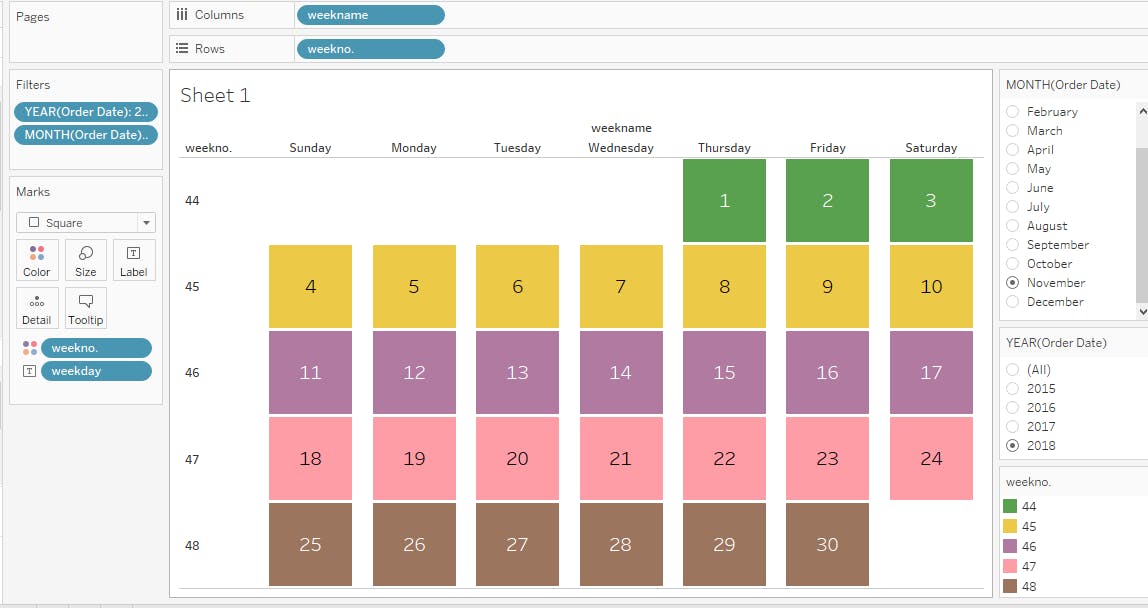
Step 5 : Put 'WeekName' on Columns shelf.
Step 6 : Put 'WeekNo.' on Rows shelf.
Step 7 : 'WeekDay' on Text field in Marks shelf.
Step 8 : 'WeekNo.' on colours fields in Marks shelf.
Once you are done with all the above steps. You will see a neat and elegant chart as below.
Hope these steps are easy for you to follow.
Thank you.